CrowdSec WAF QuickStart for WordPress
Protect a WordPress site with CrowdSec's AppSec (WAF) Component. The WordPress bouncer is a WordPress plugin, so step 3 is a short click-through in wp-admin; everything else is copy-paste on the host running CrowdSec.
Prerequisites
Make sure the following are already done (each is a single-page install guide):
- CrowdSec Security Engine installed and running — see the Linux quickstart.
- WordPress bouncer plugin installed and registered against the CrowdSec LAPI — see the WordPress bouncer guide.
1. Install the AppSec rule collections
sudo cscli collections install \
    crowdsecurity/appsec-virtual-patching \
    crowdsecurity/appsec-generic-rules
This pulls the appsec-virtual-patching collection (rules for known CVEs, auto-updated daily) and the appsec-generic-rules collection (common attack patterns), plus the default AppSec configuration.
2. Turn on the AppSec Component
Create the acquisition file, then restart CrowdSec:
sudo mkdir -p /etc/crowdsec/acquis.d
sudo tee /etc/crowdsec/acquis.d/appsec.yaml > /dev/null <<'EOF'
appsec_configs:
  - crowdsecurity/appsec-default
labels:
  type: appsec
listen_addr: 127.0.0.1:7422
source: appsec
EOF
sudo systemctl restart crowdsec
Keep listen_addr on 127.0.0.1 — the AppSec Component must not be reachable from the internet. It should only be queried by your local WordPress instance.
3. Enable AppSec in the WordPress plugin
This step uses the plugin's admin UI (no shell command):
- Log in to your WordPress admin panel.
- Open CrowdSec in your admin menu and go to the Advanced section.
- In the AppSec component block:
- Enable AppSec: check the box.
- URL:
http://127.0.0.1:7422(or your AppSec Component address if CrowdSec runs elsewhere). - Request timeout:
400ms (default). - Fallback to:
captcha(recommended). - Maximum body size:
1024KB (default). - Body size exceeded action:
headers_only(recommended).
- Save the settings.
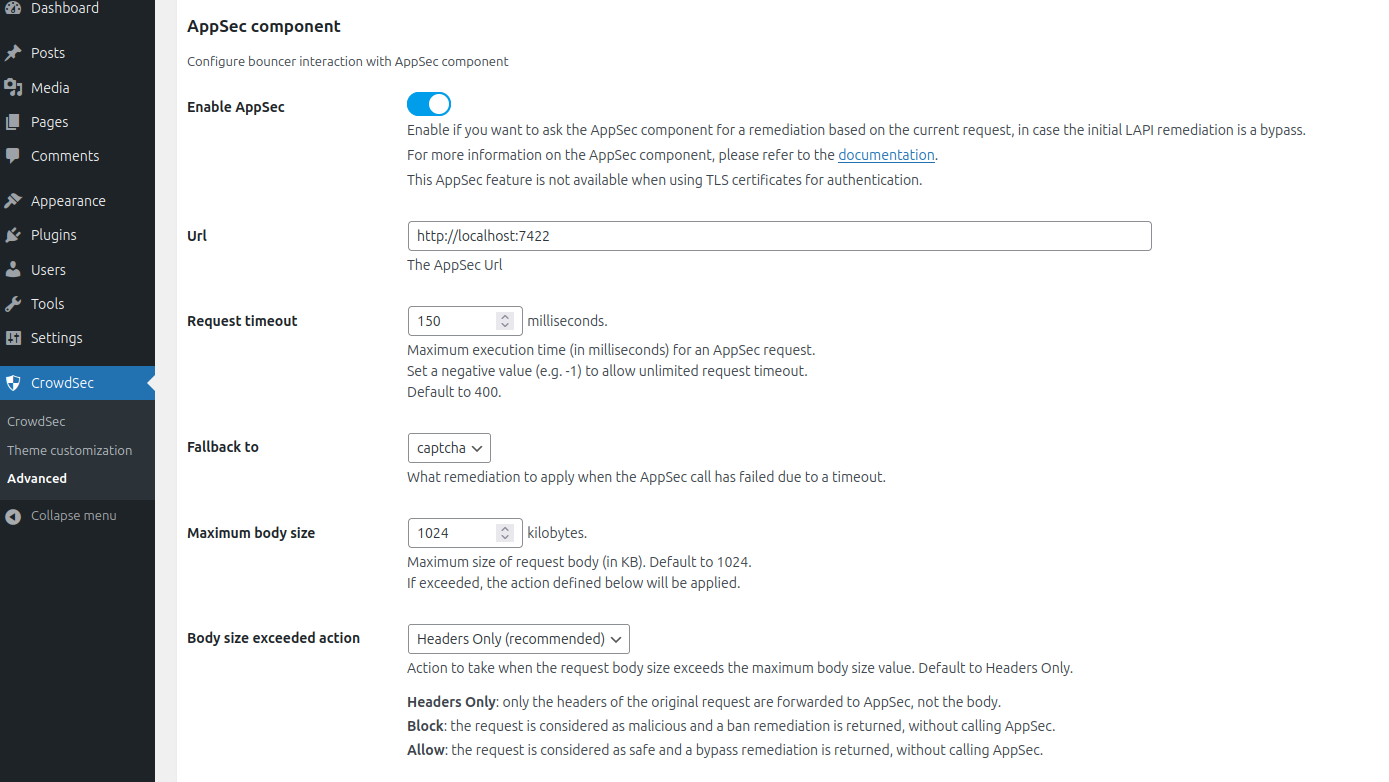
AppSec requires the WordPress plugin to use API-key authentication (not TLS certificates). The AppSec Component is only consulted when LAPI returns a bypass decision.
4. Verify
From any machine, send a request with a malicious body through WordPress — this example trips the vpatch-CVE-2022-22965 rule (Spring4Shell):
curl -X POST https://<your-wordpress-url>/ \
    -d "class.module.classLoader.resources." \
    -o /dev/null -s -w "%{http_code}\n"
You should get 403 printed.
Check that CrowdSec recorded the block:
sudo cscli metrics show appsec
Example metrics output
Appsec Metrics:
╭─────────────────┬───────────┬─────────╮
│  Appsec Engine  │ Processed │ Blocked │
├─────────────────┼───────────┼─────────┤
│ 127.0.0.1:7422/ │ 2         │ 1       │
╰─────────────────┴───────────┴─────────╯

Appsec '127.0.0.1:7422/' Rules Metrics:
╭─────────────────────────────────────┬───────────╮
│             Rule ID                 │ Triggered │
├─────────────────────────────────────┼───────────┤
│ crowdsecurity/vpatch-CVE-2022-22965 │ 1         │
╰─────────────────────────────────────┴───────────╯
What just happened?
curlsent a request with a malicious payload to WordPress.- The CrowdSec plugin intercepted the request inside the WordPress loading process.
- LAPI had no existing ban, so the plugin forwarded the request to the AppSec Component at
http://127.0.0.1:7422. - The request matched the
vpatch-CVE-2022-22965rule. - AppSec answered
403; the plugin served the configured ban page.
WordPress-specific limits
- The plugin only protects requests that go through the WordPress core loading process. Direct hits to PHP files outside WordPress — and any non-PHP file like
.envor.sql— bypass it. - For broader coverage, enable auto prepend file mode in the plugin settings.
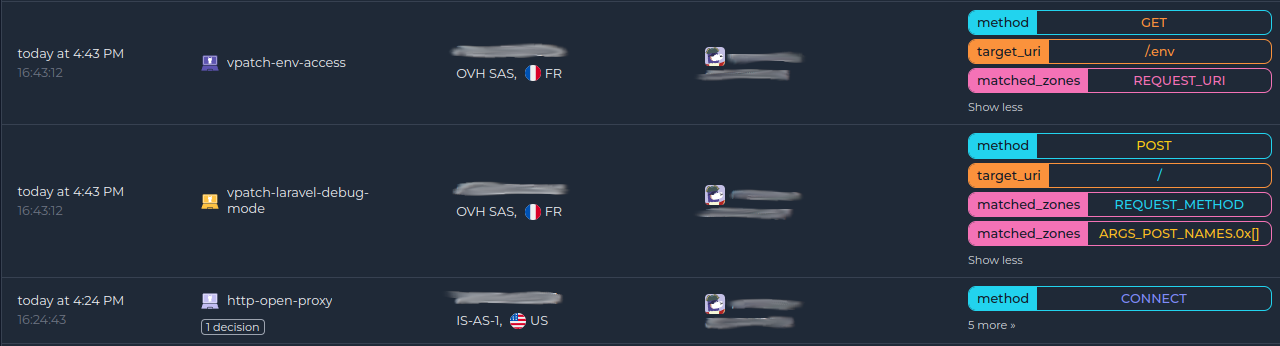
Monitor in the Console
If you haven't enrolled the Security Engine yet, follow how to enroll in the Console. Once enrolled, AppSec alerts appear alongside the rest of your alerts:
Next steps
- Monitor WAF alerts with
sudo cscli alerts listor in the CrowdSec Console. - Review the AppSec troubleshooting guide and the WordPress bouncer docs if you need to investigate or refine the deployment.
- Explore WAF deployment strategies, rules syntax, rule creation, and benchmarks to go further.