WordPress Plugin

What can you do with this plugin?
The CrowdSec WordPress plugin enables you to protect your WordPress site against malicious traffic using CrowdSec's advanced threat detection and blocklist capabilities. In this documentation, you'll find detailed instructions for these main use cases:
- Blocklist as a Service Integration: Existing CrowdSec users, use your selected blocklists directly in WordPress.
- CrowdSec Bouncer: Real-time protection by connecting your Security Engine to WordPress.
- Refer to the full user guide for comprehensive configuration and usage details.
Blocklist as a Service Integration
As an existing CrowdSec's console user you can send the blocklists you already have access to directly to your WordPress site without using a Security Engine:
Step-by-step Setup:
Step 1: Create a Blocklist Integration
- Follow this guide to create.
- Subscribe to the blocklists of your choice as indicated in these instructions.
Step 2: Configure the plugin
- Enter the endpoint URL and API Key provided during setup:
Important Configuration Notes:
- Enable Stream mode in advanced settings for direct blocklist integrations.
- AppSec features are unavailable in this mode.
CrowdSec WordPress Bouncer Plugin - User Guide
Description
The CrowdSec Bouncer plugin for WordPress has been designed to protect WordPress websites from various malicious activities by using CrowdSec technology.
N.B.: it's important to understand the scope and limitations of this bouncer, as described in the Understanding the limitations of the bouncer section.
Prerequisites
To be able to use this Remediation component, the first step is to install CrowdSec v1.
CrowdSec is only in charge of the "detection", and won't block anything on its own. You need to deploy a remediation to "apply" decisions.
Please note that first and foremost CrowdSec must be installed on a server that is accessible via the WordPress site.
Features
When a user is suspected by CrowdSec to be malevolent, this component will either send him/her a captcha to resolve or simply a page notifying that access is denied. If the user is considered as a clean user, he will access the page as normal.
By default, the ban wall is displayed as below:

By default, the captcha wall is displayed as below:

Please note that it is possible to customize all the colors of these pages in a few clicks so that they integrate best with your design.
On the other hand, all texts are also fully customizable. This will allow you, for example, to present translated pages in your users’ language.
Understanding the limitations of the bouncer
While this plugin provides effective protection for most scenarios by intercepting and bouncing web requests that go through the WordPress loading process, there are inherent limitations to this approach. These limitations can create potential gaps in coverage, which you should be aware of:
-
Requests to PHP files outside the WordPress Core loading process
Since this plugin is loaded as part of the WordPress core process, it will not attempt to retrieve or apply a remediation if a custom public PHP script is accessed directly. To ensure all PHP scripts are covered, consider enabling the auto_prepend_file mode.
-
Requests to Non-PHP Files (e.g.
.envor other static files)
Requests for non-PHP files, such as .env or other static files, are not handled by this plugin.
As this limitation is tied to the nature of PHP itself, you may need to implement additional server-level protections (e.g., strict file permissions or blocking access to sensitive files through server configuration) to secure such files.
For example, you can deny access to hidden files, using the Nginx directive
location ~ /\. {
    deny all;
}
or the Apache one:
<FilesMatch "^\.">
    Require all denied
</FilesMatch>
By understanding these limitations, you can take additional steps to secure your site comprehensively and complement the protection offered by the CrowdSec Bouncer plugin.
Configurations
This plugin comes with configurations that you will find under CrowdSec admin section.
These configurations are divided in three main parts : CrowdSec, Theme customization and Advanced.
General settings
In the CrowdSec part, you will set your connection details and refine bouncing according to your needs. You will
also be able to test your settings.

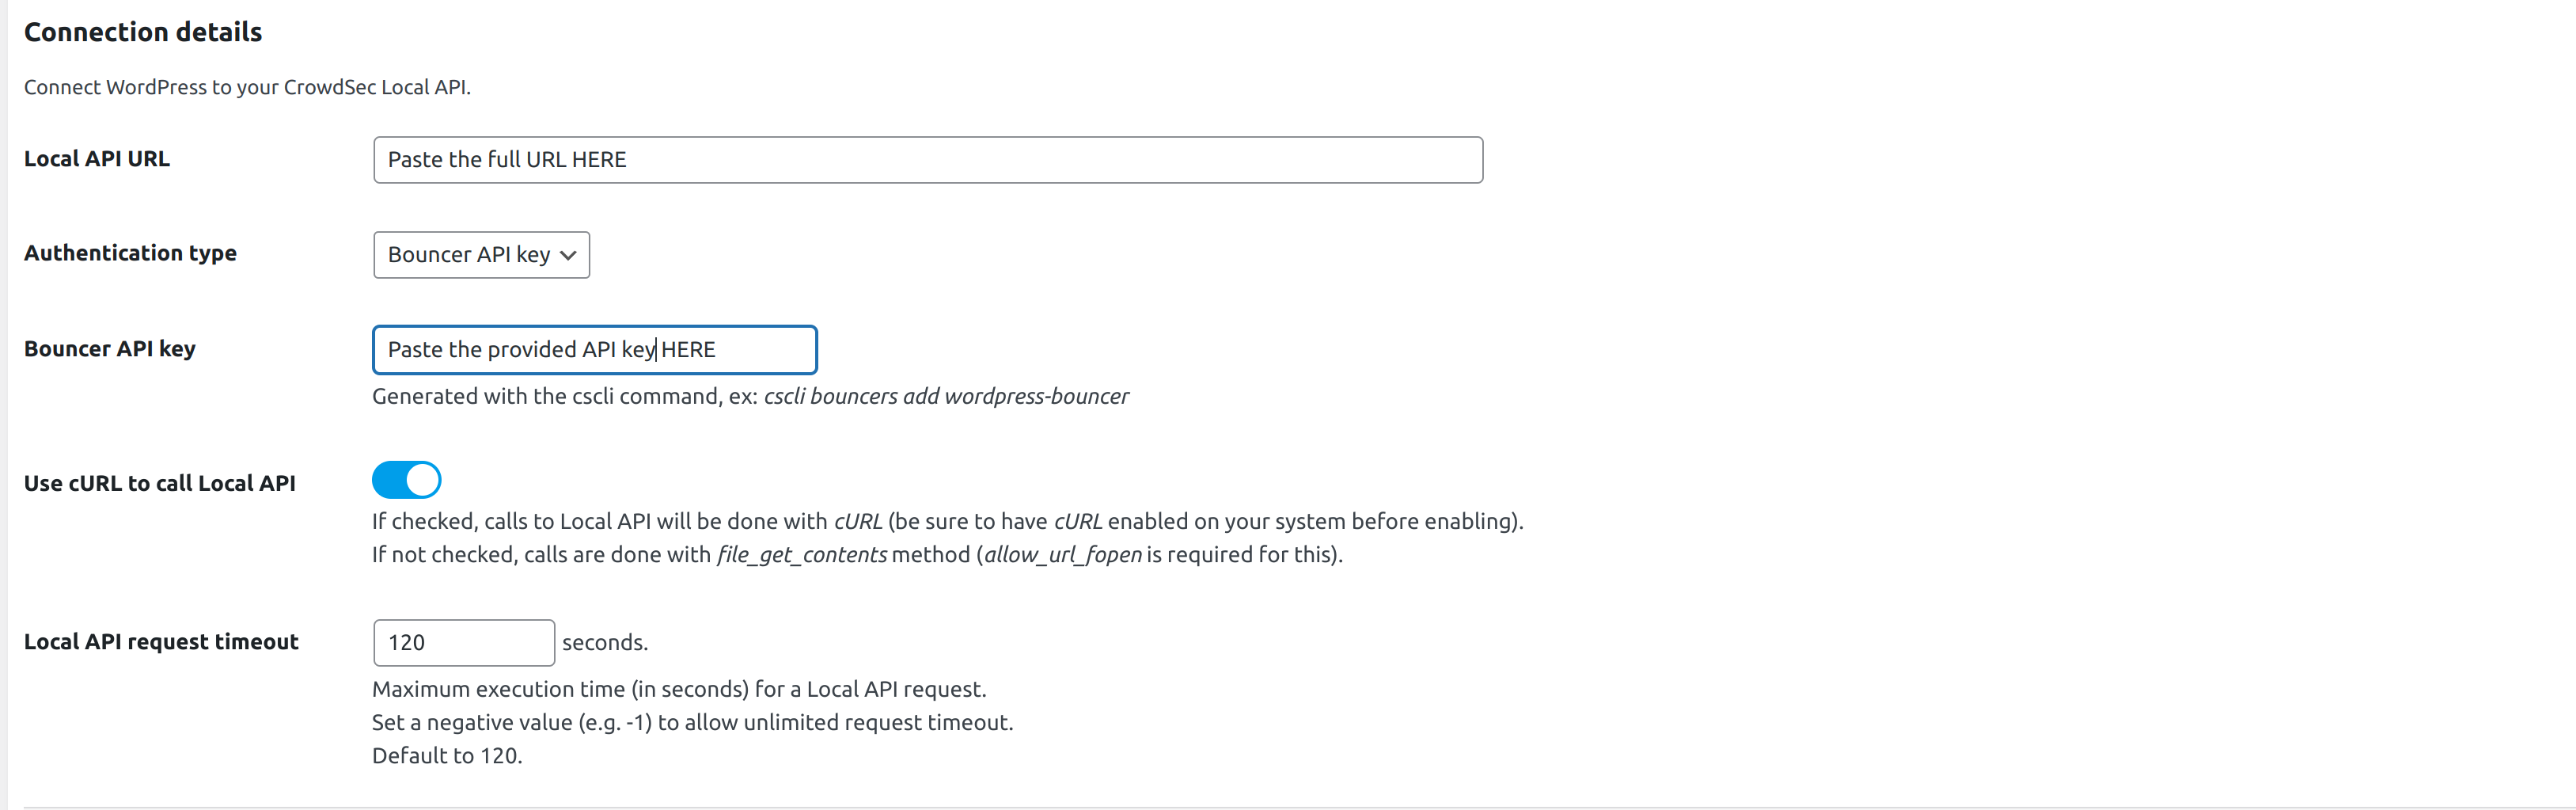
Connection details → Local API URL
Url to join your CrowdSec Local API.
If the CrowdSec Agent is installed on this server, you could set this field to http://localhost:8080.
Default to http://localhost:8080
Connection details → Authentication type
Choose between Bouncer API key and TLS certificates (pki) authentication.
TLS authentication is only available if you use CrowdSec agent with a version superior to 1.4.0. Please see CrowdSec documentation.
Connection details → Bouncer API key
Key generated by the cscli command.
Only if you chose Bouncer API key as authentication type.
Connection details → Path to the bouncer certificate
Absolute path. Make sure this file is not publicly accessible. See security note below.
Example: /var/crowdsec/tls/bouncer.pem.
Only if you chose TLS certificates as authentication type.
Connection details → Path to the bouncer key
Absolute path. Make sure this file is not publicly accessible. See security note below.
Example: /var/crowdsec/tls/bouncer-key.pem.
Only if you chose TLS certificates as authentication type.
Connection details → Verify peer
This option determines whether request handler verifies the authenticity of the peer's certificate.
Only if you chose TLS certificates as authentication type.
When negotiating a TLS or SSL connection, the server sends a certificate indicating its identity. If Verify peer is checked, request handler verifies whether the certificate is authentic. This trust is based on a chain of digital signatures, rooted in certification authority (CA) certificate you supply using the Path to the CA used to process for peer verification setting below.
Connection details → Path to the CA certificate used to process peer verification
Absolute path. Make sure this file is not publicly accessible. See security note below.
Example: /var/crowdsec/tls/ca-chain.pem.
Only if you chose TLS certificates as authentication type.
Connection details → Use cURL to call Local API
By default, file_get_contents method is used to call Local API. This method requires to have enabled the option allow_url_fopen.
Here, you can choose to use cURL requests instead. Beware that in this case, you need to have php cURL extension installed and enabled on your system.
Connection details → Local API request timeout
By default, the maximum allowed time to perform a Local API request is 120 seconds. You can change this setting here. If you set a negative value, request timeout will be unlimited.

Bouncing → Bouncing level
Choose if you want to apply CrowdSec directives (Normal bouncing) or be more permissive (Flex bouncing).
With the Flex mode, it is impossible to accidentally block access to your site to people who don’t deserve it. This mode makes it possible to never ban an IP but only to offer a captcha, in the worst-case scenario.
Bouncing → Public website only
If enabled, Admin related requests are not protected.
Important notes: We recommend to leave this setting to OFF in order to apply protection to your WordPress admin:
- WordPress admin is a frequent target of cyber attacks.
- Also, some critical public endpoints are considered "admin" and would be unprotected If this setting was ON.

Test your settings → Test bouncing
Click the "Test bouncing" button and the configured bouncer will try to get the remediation (bypass, captcha or ban) for the IP entered in the text field. By default, tested IP is the current detected remote IP.
This test allows you to know if your connection, bouncing and cache settings are correct.
Test your settings → Test geolocation
Click the "Test geolocation" button to try getting country for the IP entered in the text field.
This test allows you to know if your geolocation settings are correct.
Theme customization
In the Theme customization part, you can modify texts and colors of ban and captcha walls.


Advanced settings
In the Advanced part, you can enable/disable the stream mode, choose your cache system for your CrowdSec Local API, handle your remediation policy, manage geolocation feature, adjust some debug parameters and testing parameters.

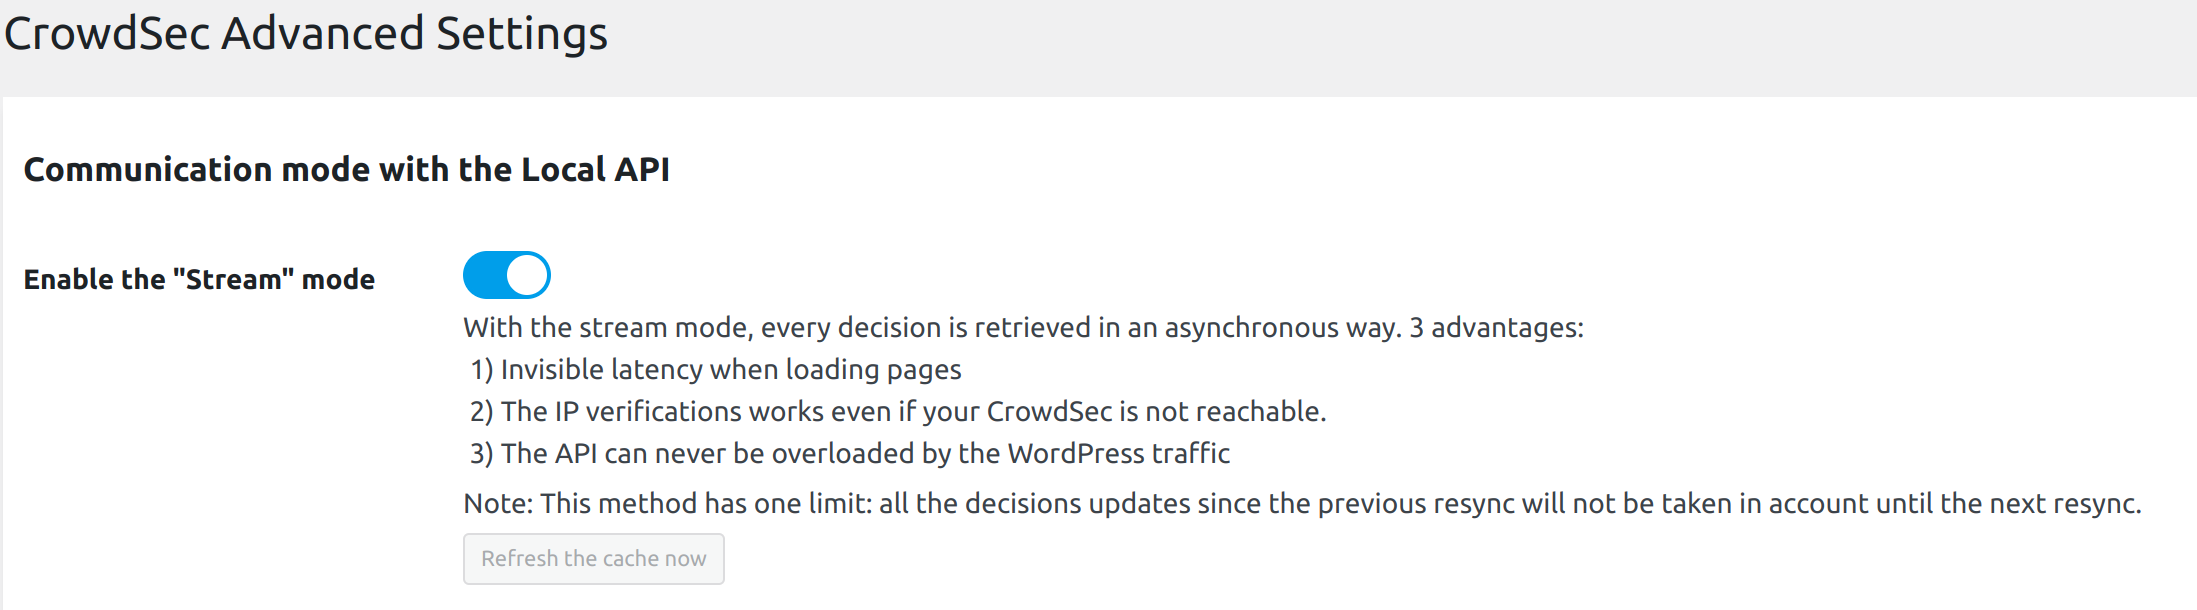
Communication mode to the API → Enable the "Stream mode"
Choose if you want to enable the stream mode or stay in live mode.
By default, the live mode is enabled. The first time a stranger connects to your website, this mode means that the IP will be checked directly by the CrowdSec API. The rest of your user’s browsing will be even more transparent thanks to the fully customizable cache system.
But you can also activate the stream mode. This mode allows you to constantly feed the bouncer with the malicious IP list via a background task (CRON), making it to be even faster when checking the IP of your visitors. Besides, if your site has a lot of unique visitors at the same time, this will not influence the traffic to the API of your CrowdSec instance.
Communication mode to the API → Resync decisions each (stream mode only)
With the stream mode, every decision is retrieved in an asynchronous way. Here you can define the frequency of this cache refresh.
N.B : There is also a refresh button if you want to refresh the cache manually.
Config Remediation Metrics

Remediation Metrics → Enable the Remediation Metrics
Enable remediation metrics to gain visibility: monitor incoming traffic and blocked threats for better security insights.
If this option is enabled, a cron job will push remediation metrics to the Local API every 15 minutes.
For more information about remediation metrics, please refer to the documentation.
N.B : There is also a push button if you want to push remediation metrics manually.

Caching configuration → Technology
Choose the cache technology that will use your CrowdSec Local API.
The File system cache is faster than calling Local API. Redis or Memcached is faster than the File System cache.
N.B. : There are also a Clear now button for all cache technologies and a Prune now button dedicated to the file system cache.
Caching configuration → Recheck clean IPs each (live mode only)
The duration between re-asking Local API about an already checked clean IP.
Minimum 1 second. Note that this setting can not be apply in stream mode.
Caching configuration → Recheck bad IPs each (live mode only)
The duration between re-asking Local API about an already checked bad IP.
Minimum 1 second. Note that this setting can not be used in stream mode.
Caching configuration → Captcha flow cache lifetime
The lifetime of cached captcha flow for some IP.
If a user has to interact with a captcha wall, we store in cache some values in order to know if he has to resolve or not the captcha again.
Minimum 1 second. Default: 86400 seconds.
Caching configuration → Redis DSN (if applicable)
Fill in this field only if you have chosen the Redis cache.
Example of DSN: redis://localhost:6379.
Caching configuration → Memcached DSN (if applicable)
Fill in this field only if you have chosen the Memcached cache.
Example of DSN: memcached://localhost:11211.

AppSec component → Enable AppSec
Enable if you want to ask the AppSec component for a remediation based on the current request, in case the initial LAPI remediation is a bypass.
Not available if you use TLS certificates as authentication type.
For more information on the AppSec component, please refer to the documentation.
AppSec component → Url
Your AppSec component url. Default to http://localhost:7422
AppSec component → Request timeout
Maximum execution time (in milliseconds) for an AppSec request.
Set a negative value to allow unlimited timeout
Default to 400.
AppSec component → Fallback to
What remediation to apply when AppSec call has failed due to a timeout.
Recommended: captcha. Default: bypass.
AppSec component → Maximum body size
Maximum size of the request body (in KB). Default to 1024.
If exceeded, the action defined below will be applied.
AppSec component → Body size exceeded action
Action to take when the request body size exceeds the maximum body size.
Default to headers_only.
Headers Only: (recommended) Only headers of the original request are sent to the AppSec component. The body is not sent.Block: The request is considered as malicious and a ban remediation is returned, without calling AppSec.Allow: (not recommended): The request is considered as clean and a bypass remediation is returned, without calling AppSec.

Remediation → Fallback to
Choose which remediation to apply when CrowdSec advises unhandled remediation.
Remediation → Trust these CDN IPs (or Load Balancer, HTTP Proxy)
If you use a CDN, a reverse proxy or a load balancer, it is possible to indicate in the bouncer settings the IP ranges of these devices in order to be able to check the IP of your users. For other IPs, the bouncer will not trust the X-Forwarded-For header.
Remediation → Hide CrowdSec mentions
Enable if you want to hide CrowdSec mentions on the Ban and Captcha walls.

Geolocation → Enable geolocation feature
Enable if you want to use also CrowdSec country scoped decisions. If enabled, bounced IP will be geolocalized and the final remediation will take into account any country related decision.
Geolocation → Geolocation type
For now, only Maxmind database type is allowed
Geolocation → MaxMind database type
Choose between Country and City.
Geolocation → Path to the MaxMind database
Absolute path. Make sure this file is not publicly accessible. See security note below.
Example: /var/crowdsec/geolocation/Geoloc-country.mmdb folder.
Geolocation → Geolocation cache lifetime
The lifetime of cached country geolocation result for some IP. Default: 86400. Set 0 to disable caching. Enabling this will avoid multiple call to the geolocation system (e.g. MaxMind database)

Debug mode → Enable debug mode
Enable if you want to see some debug information in a specific log file.
When this mode is enabled, a debug.log file will be written in wp-content/uploads/crowdsec/logs folder.
Make sure this path is not publicly accessible. See security note below.
Debug mode → Disable prod log
By default, a prod.log file will be written in wp-content/uploads/crowdsec/logs folder.
Make sure this path is not publicly accessible. See security note below.
You can disable this log here.
Debug mode → Custom User-Agent
By default, User-Agent used to call LAPI has the following format: csphplapi_WordPress.
You can use this field to add a custom suffix: csphplapi_WordPress[custom-suffix].
This can be useful to debug crowdsec logs when using multiple WordPress sites with multiple bouncer plugins.
Only alphanumeric characters ([A-Za-z0-9]) are allowed with a maximum of 5 characters.
Display errors → Enable errors display
When this mode is enabled, you will see every unexpected bouncing errors in the browser. Should be disabled in production.

Auto prepend file mode → Enable auto_prepend_file mode
This setting allows the bouncer to bounce IPs before running any PHP script in the project.
Make sure the generated standalone-settings.php file is not publicly accessible. See security note below.
Test settings → Forced test IP
This Ip will be used instead of the current detected browser IP.
Must be empty in production.
Test settings → Forced test X-Forwarded-For IP
This Ip will be used instead of the current X-Forwarded-For Ip if any.
Must be empty in production.
Security
Some files used or created by this plugin must be protected from direct access attempts:
- The
standalone-settings.phpfile created in thewp-content/plugins/crowdsec/incfolder for the Auto Prepend File mode - Log files are created in the
wp-content/uploads/crowdsec/logsfolder - Cache files of the File system cache are created in the
wp-content/uploads/crowdsec/cachefolder - TLS authentication files are located in a user defined path
- Geolocation database files are located in a user defined path
N.B.:
-
There is no need to protect
standalone-settings.phpfile if you don't useauto_prepend_filemode. -
There is no need to protect cache files if you are using Redis or Memcached cache systems.
-
There is no need to protect log files if you disable debug and prod logging.
-
There is no need to protect TLS files if you use Bouncer API key authentication type.
-
There is no need to protect geolocation files if you don't use the geolocation feature.
Nginx
If you are using Nginx, you should add a directive in your website configuration file to deny access to these folders.
For log, cache and standalone setting files, this could be done with the following snippet:
server {
   ...
   ...
   ...
   # Deny all attempts to access some folders of the crowdsec plugin
   location ~ /crowdsec/(cache|logs|inc/standalone-settings) {
           deny all;
   }
   ...
   ...
}
Apache
If you are using Apache, the plugin root folder already contain the required .htaccess file to protect log,
cache and standalone setting files:
Redirectmatch 403 wp-content/uploads/crowdsec/logs/
Redirectmatch 403 wp-content/uploads/crowdsec/cache/
Redirectmatch 403 wp-content/plugins/crowdsec/inc/standalone-settings
Auto Prepend File mode
By default, this extension will bounce every web requests that pass through the classical process of WordPress core loading. This implies that if another php public script is called (any of your custom public php script for example) or if you are using some plugin that bypass the WordPress core load process (as the WP Super Cache plugin in Simple mode for example), bouncing will not be effective.
To ensure that any php script will be bounced if called from a browser, you should try the auto prepend file mode.
In this mode, every browser access to a PHP script will be bounced.
To enable the auto prepend file mode, you have to configure your server by adding an auto_prepend_file directive for your php setup.
N.B.:
-
In this mode, a setting file
inc/standalone-settings.phpwill be generated each time you save the CrowdSec plugin configuration from the WordPress admin. Make sure this file is not publicly accessible. See security note above. -
This mode requires to have the plugin installed in the
wp-content/plugins/crowdsecfolder. This is the default installation folder of WordPress plugins.
Adding an auto_prepend_file directive can be done in different ways:
PHP
You should add this line to a .ini file :
auto_prepend_file = /wordpress-root-directory/wp-content/plugins/crowdsec/inc/standalone-bounce.php
Nginx
If you are using Nginx, you should modify your Magento 2 nginx configuration file by adding a fastcgi_param
directive. The php block should look like below:
location ~ \.php$ {
    ...
    ...
    ...
    fastcgi_param PHP_VALUE "auto_prepend_file=/wordpress-root-directory/wp-content/plugins/crowdsec/inc/standalone-bounce.php";
}
Apache
If you are using Apache, you should add this line to your .htaccess file:
php_value auto_prepend_file "/wordpress-root-directory/wp-content/plugins/crowdsec/inc/standalone-bounce.php"
Multisite usage
If you are using the multisite WordPress feature, the bouncer plugin has to be network activated and
configurations will be used for all sites of the network. This means that every individual site on your network will be protected by the bouncer with the same settings.
Differences with a single installation
In a WordPress multisite installation, CrowdSec configurations are accessible via the My Sites -> Network admin left panel.

Settings are stored in the wp_sitemeta table instead of the wp_options table for a single WordPress installation.
Resources
Feel free to look at the associated article for more configuration options and tweaks.
Installation
Add the plugin
The component itself can be installed from the marketplace in WordPress back-office.
Installing the CrowdSec WordPress plugin is as easy as installing any other WordPress plugin:
- Click
Pluginsin the left navigation on your site’s dashboard. - Type
CrowdSecin the text field to the right. Hit enter. - In the CrowdSec plugin click
Install Now - Once installed click
Activate.
WordPress Marketplace
You can find this plugin on the WordPress Plugins Marketplace.
Technical notes
We explain here each important technical decision used to design this plugin.
How to use system CRON instead of wp-cron?
Add define('DISABLE_WP_CRON', true); in wp-config.php then enter this command line on the WordPress host command
line:
(crontab -l && echo "* * * * * wget -q -O - http://<host>:<port>/wp-cron.php?doing_wp_cron >/dev/null 2>&1") | crontab -
Note: replace
<host:<port>with the local url of your website
More info here.
Developer guide
See Developer guide